




How to install underfloor heating: the complete DIY guide

Tired of waking up to cold floors? High energy bills for a system that still leaves you chilly can be frustrating. The good news is you can solve this yourself. Our clear, step-by-step guide will help you install underfloor heating, so you can enjoy a warm, comfortable home. We’ll walk you through each step.
Quick summary
You can install underfloor heating yourself. This works for solid concrete, suspended timber, or an existing floor you want to keep. Choose electric mats for a fast, thin fit. Or pick wet pipes for the best long-term savings. On existing concrete, you can chase in narrow grooves instead of raising the whole floor. Always hire a professional electrician or plumber for the final boiler connection.
Planning and preparing your subfloor
Before you start, a few planning decisions are important. They help your installation go smoothly. Here’s what every DIYer should think about first.
Things every DIYer needs to know
Many homeowners ask if DIY underfloor heating is possible. Yes, laying electric mats or wet pipes is safe for confident DIYers. A qualified professional must still complete the final boiler or mains connection. This keeps your home safe from faulty wiring or leaks.
Floor depth worries most people first. A full wet installation raises your floor height by roughly 30 to 100mm. A chased or low-profile retrofit system adds as little as 15 to 25mm instead.
Measure the gap under your doors first. This tells you whether a joiner needs to trim them later.
Choosing between electric and wet systems
Electric underfloor heating is effective for small rooms, while wet systems are better suited for heating entire homes.
Electric mats
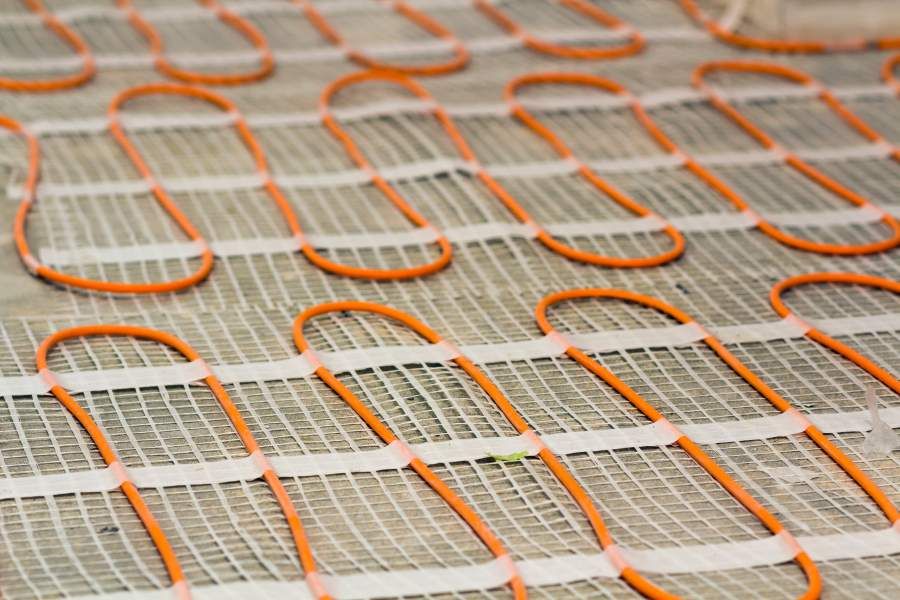
An electric underfloor heating system. Image: Shutterstock.com
Wet pipes
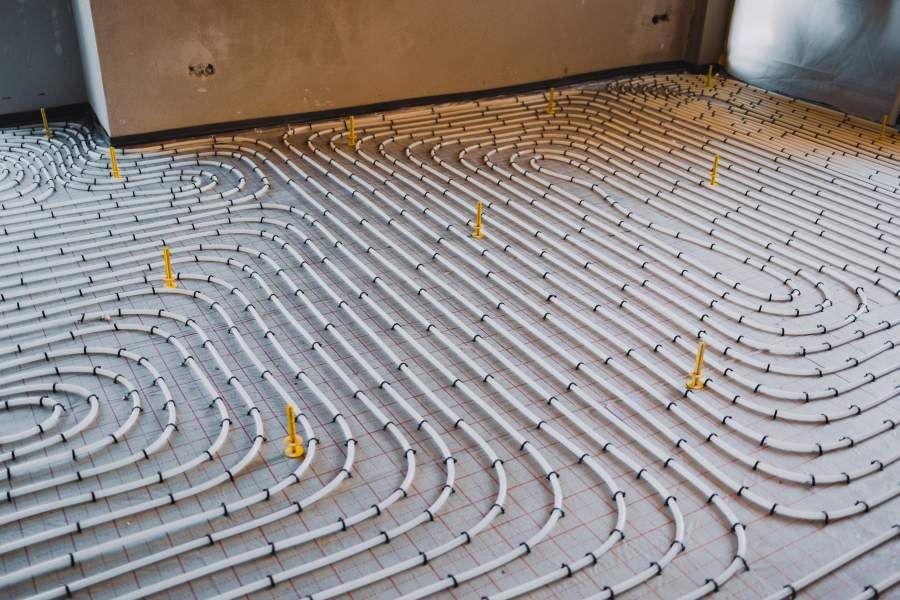
A water-based underfloor heating system. Image: Shutterstock.com
| Electric mats | Wet pipes | |
|---|---|---|
| Best for | Small rooms, quick remodels | Whole-house heating |
| Heat-up speed | Fast | Slower, steadier |
| Floor depth added | As little as 1.8mm | 15-100mm, depending on the method |
| Running costs | Higher | Lower over time |
| Connects to | Mains electricity | Combi boiler |
Installing on concrete floors
Planning a new build or full renovation? Lay wet pipes directly on your concrete slab. Start with a damp proof membrane. This stops ground moisture from rising and damaging your system.
Next, fit rigid insulation boards across the floor. Run your pipes on top, then pour a self-levelling screed. This full-height method gives the most even result of all the options.
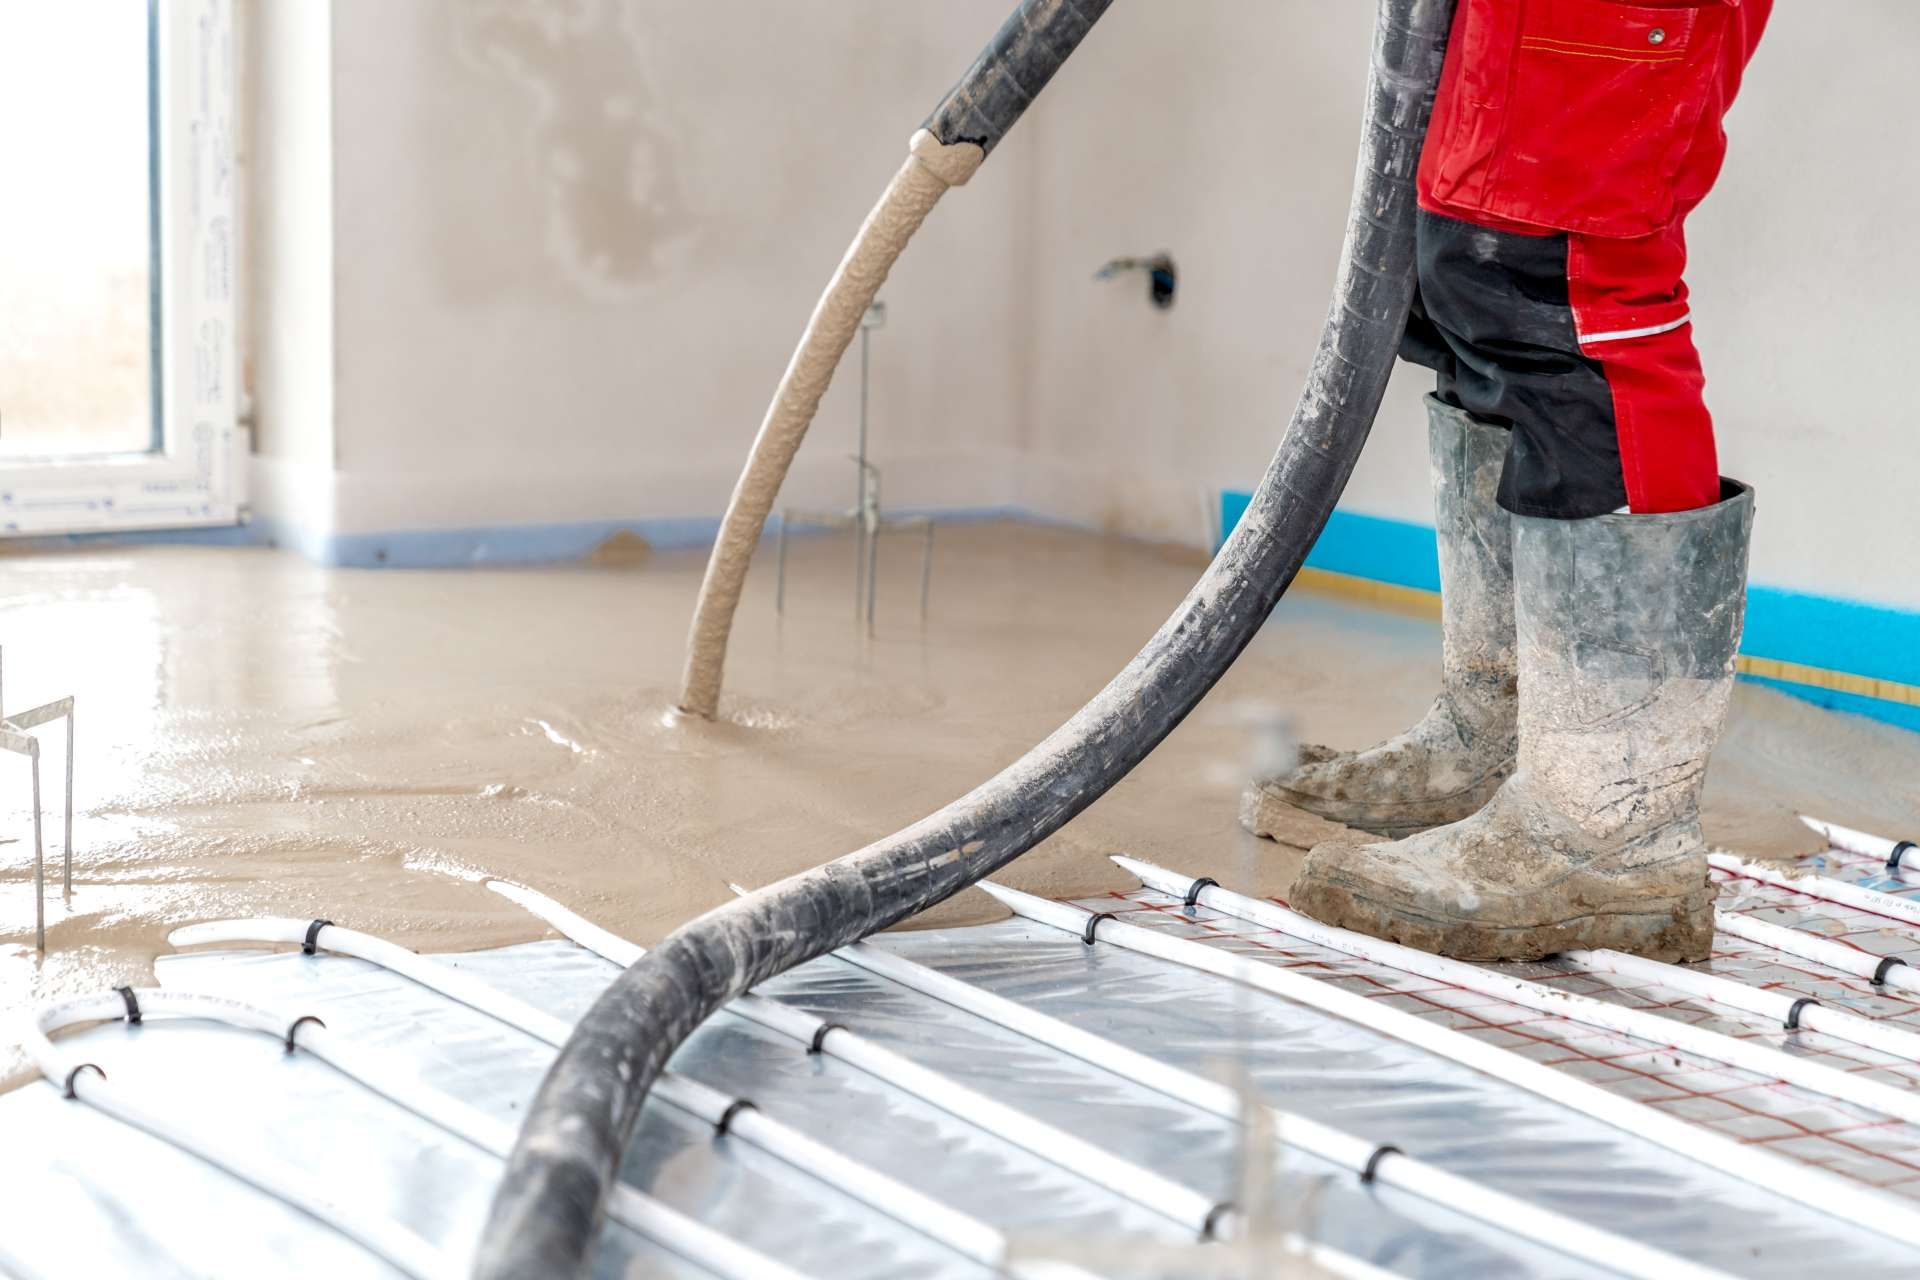
Self-levelling screed application on the underfloor heating. Image: Shutterstock.com
Retrofitting without lifting the floor
Already have a finished concrete floor? You do not need to dig it all out. Installers commonly cut narrow parallel grooves into the slab. This method is called chasing, routing, or milled screed.
A professional cuts grooves roughly 20 to 25mm deep. The groove must fit 12 to 16mm pipe. The pipe clips in, then a levelling compound fills the gap. This keeps your floor height almost unchanged, which matters most in kitchens with fitted units.
This process is very dusty. Clear the room and seal doorways with plastic sheeting first.
An alternative is a routed overlay board. This thin panel has pre-cut grooves for the pipe. It sits on top of your existing floor, adding only 15 to 18mm.
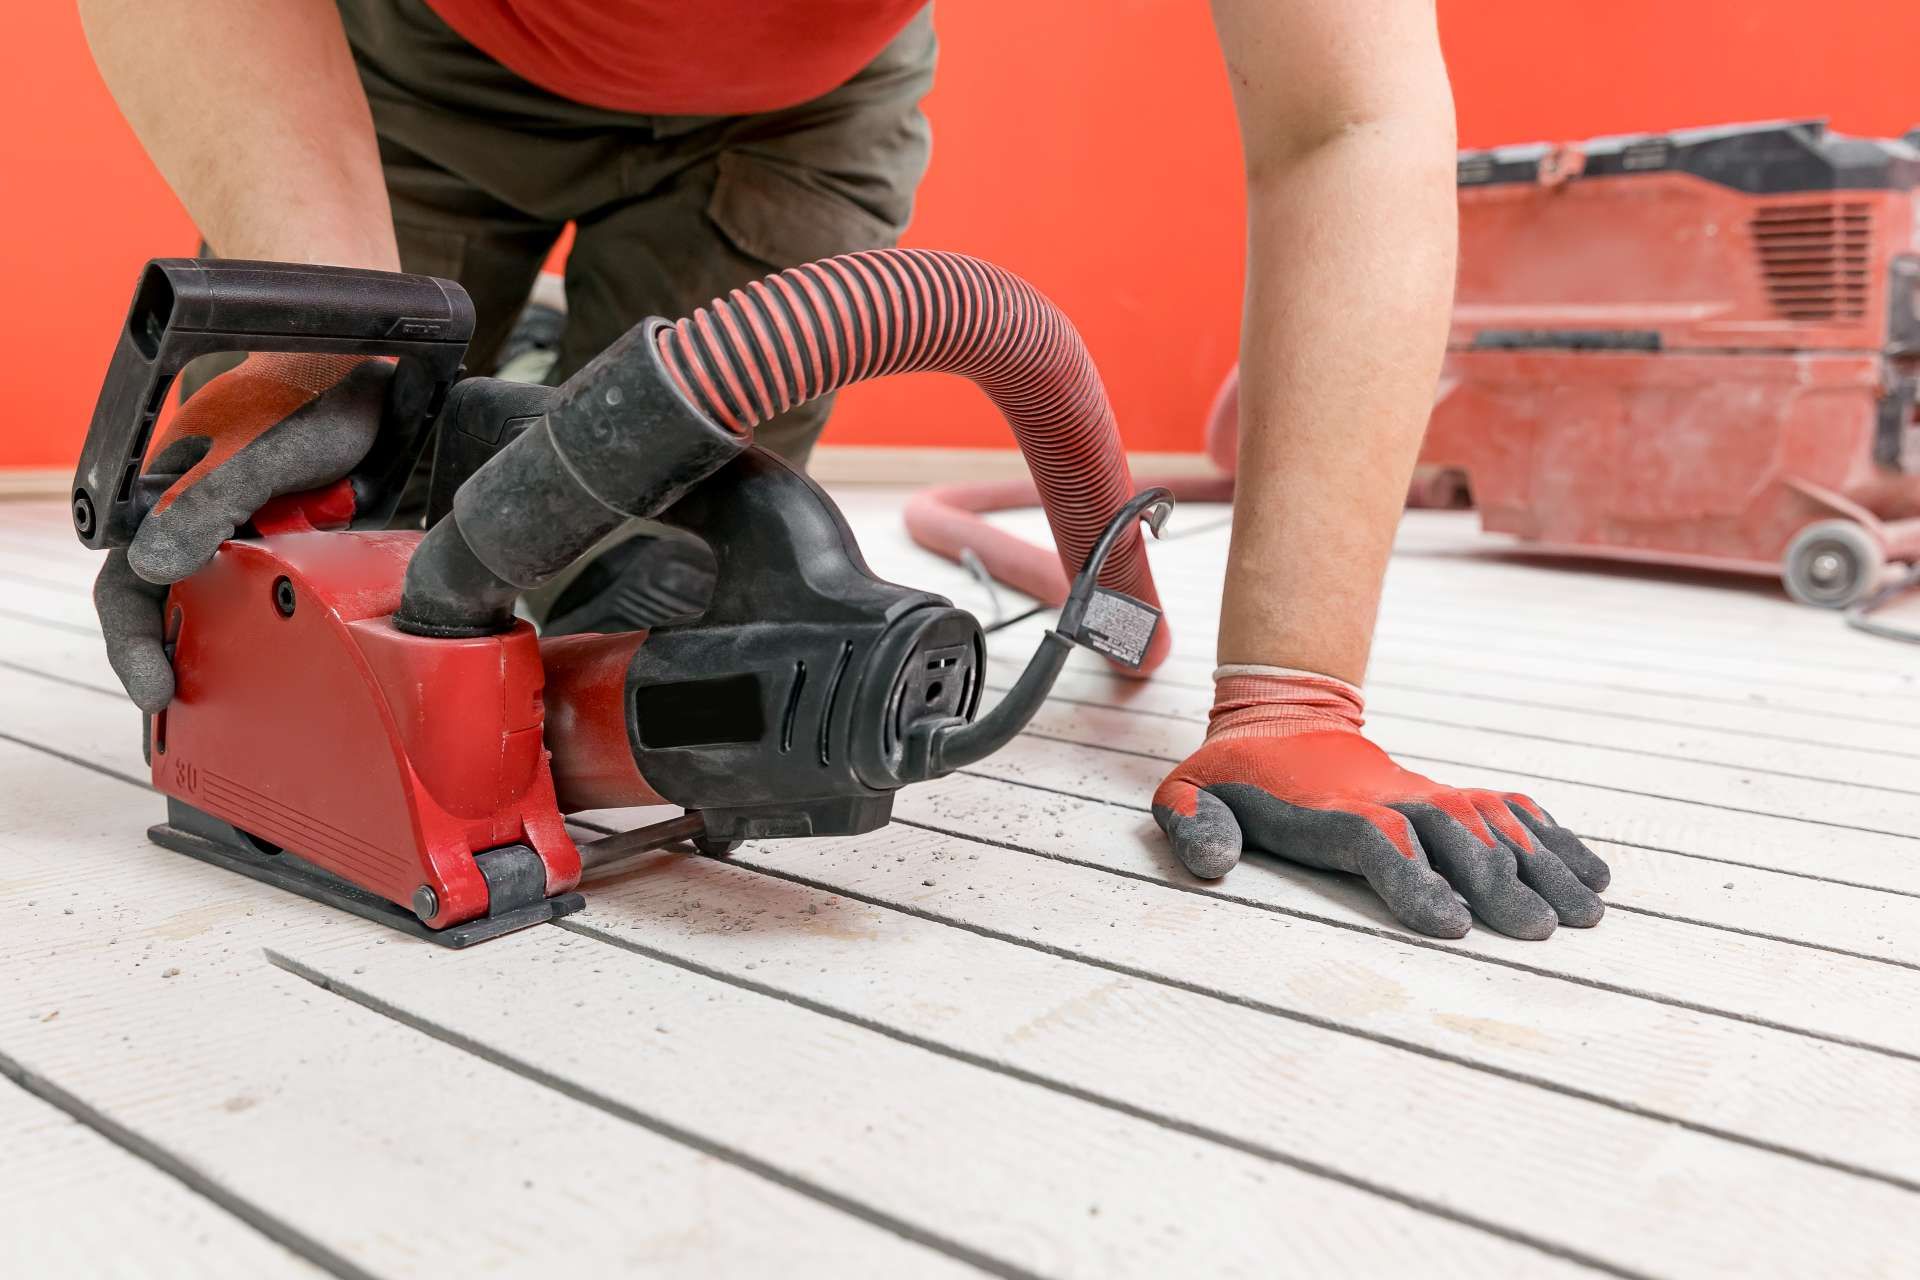
Creating a grouted groove in an existing concrete floor. Image: Shutterstock.com
Suspended timber floors and floorboards
When installing underfloor heating on suspended timber floors, check your joists first. Place rigid insulation tightly between the joists to support the heating pipes and direct warmth up into your room instead of the space below.
If you’re working with existing floorboards, make sure each one is screwed down flat. A solid base prevents squeaks and protects your heating elements from movement.
This method works well for older homes with timber suspended floors. Lifting the whole floor isn’t always practical, but careful insulation between joists still gives good results.
Step-by-step: wet system installation
Once your subfloor is ready, follow these steps in order.
Step 1: Fit the edge insulation strip
Fit edge insulation strips around your room perimeter. These flexible strips let the floor expand safely as it warms. Wood and screed both expand naturally with heat.
Run the strip slightly taller than your finished height. Trim the excess once the screed has dried.
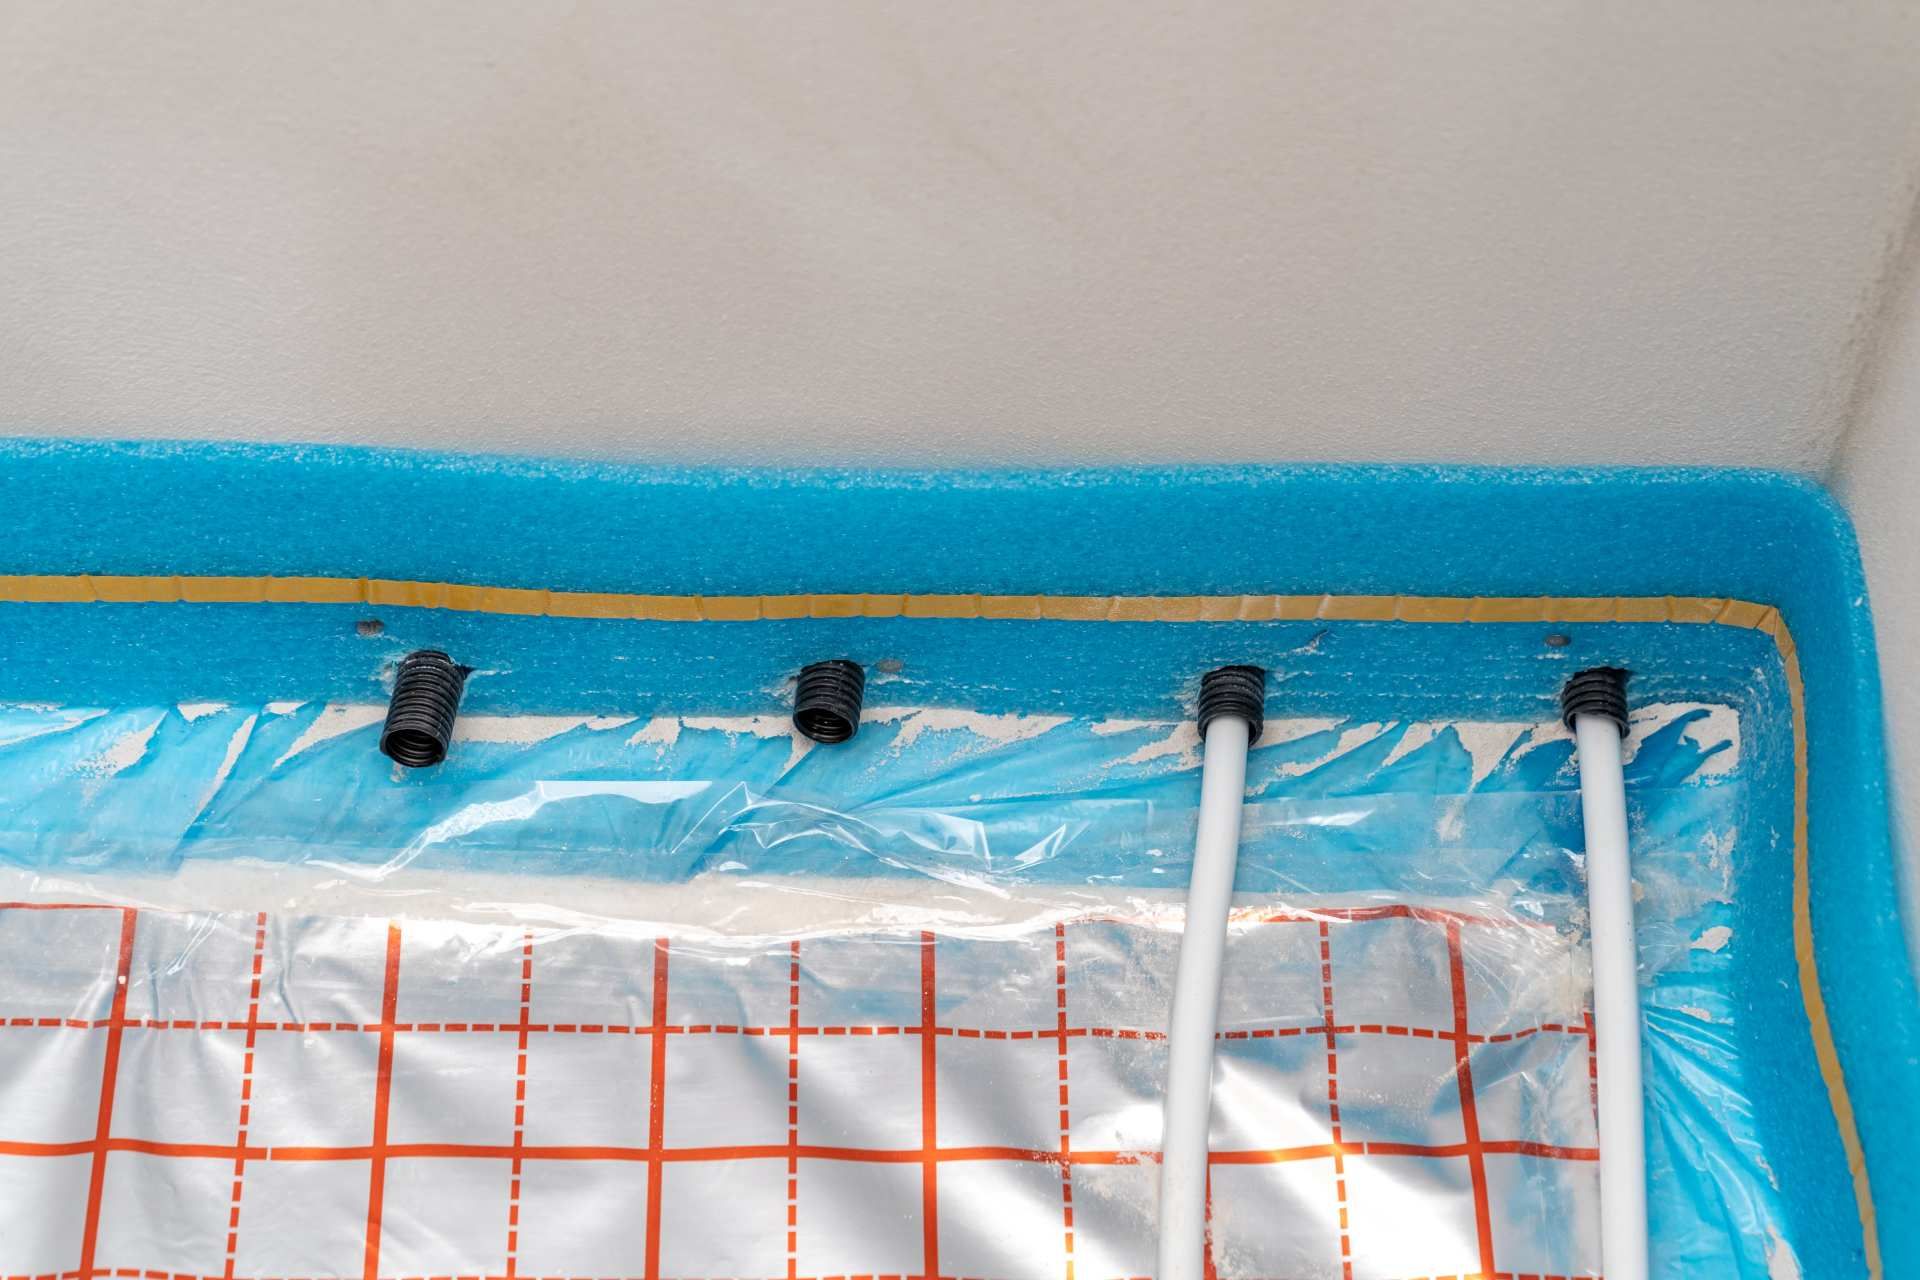
Edge insulation strips around the room perimeter. Image: Shutterstock.com
Step 2: Lay the insulation boards
Lay your insulation boards, or your chosen retrofit panels, tightly together. Tape every joint securely with waterproof tape. This stops liquid screed from leaking through the gaps later.
Step 3: Install the manifold
Mount the underfloor heating manifold securely to your wall. It works as a central hub, splitting warm water evenly across room zones. Every room reaches the temperature you set.
Connect a reliable central heating pump here. The pump pushes hot water through the pipes at a steady pace. Every corner warms evenly.
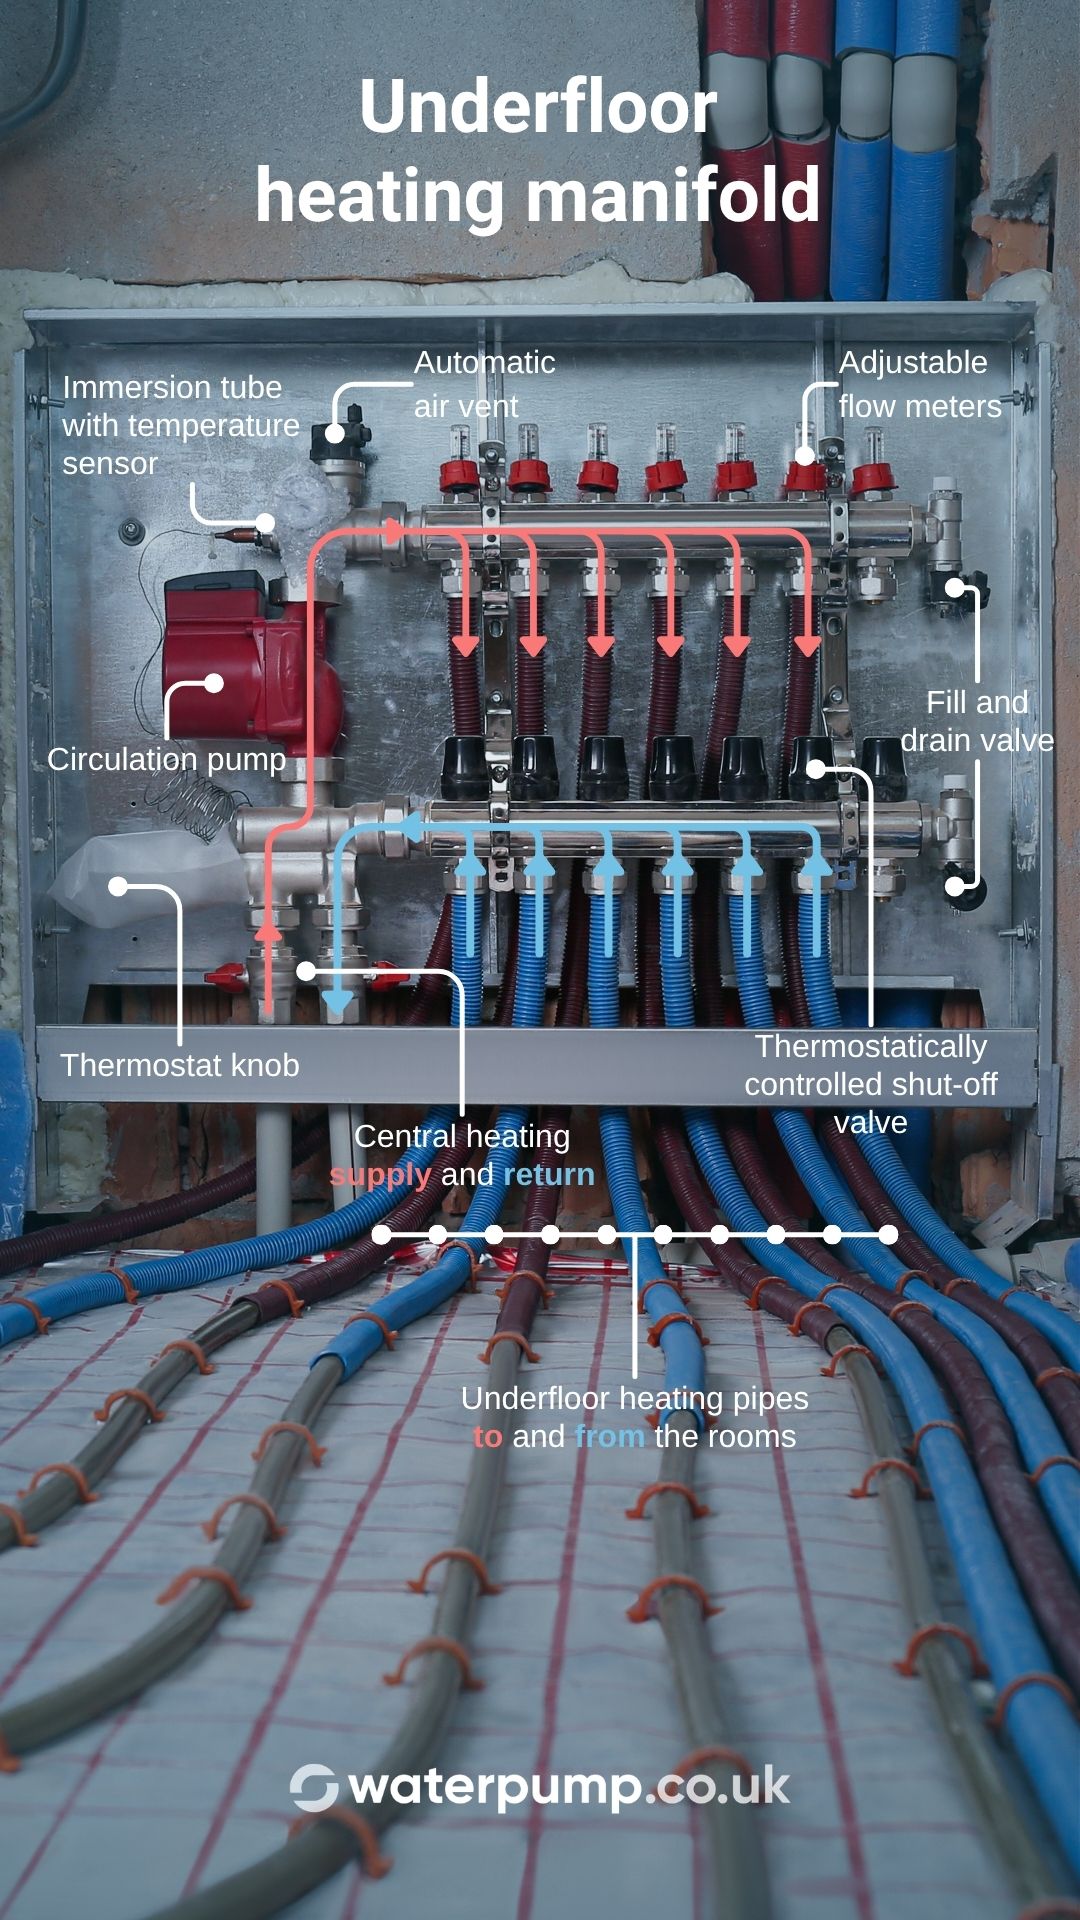
These are the most important components of an underfloor heating manifold. Image: Waterpump.co.uk
Need a reliable pump for your new manifold?
Browse our central heating pumps at Waterpump.co.uk. They are designed for easy, DIY friendly installation.
Popular circulation pumps for the underfloor heating manifold
Step 4: Lay or clip in the pipes
Unroll the pipes carefully and clip them into your boards or grooves. Space each loop roughly 150 to 300mm apart. Narrower spacing suits rooms that lose heat quickly, such as bathrooms.
Stay at least 600mm from outside walls. These lose the most heat and can create cold spots.
Step 5: Pressure test and finish with screed
Pressure test the system before you cover it. This check reveals hidden leaks before they become expensive problems. Once it passes, pour or trowel on your screed or compound.
Let it dry fully before you walk on it, usually for several days. Rushing this step is the most common cause of cracked floors later.
Step-by-step: electric mat installation
Electric systems follow a shorter process. They suit rooms where raising the floor is not an option.
Roll the mats out across your prepared floor. Never cut the heating cable itself, since this damages the system. You can only trim the mesh backing around corners.
Fit the thermostat sensor in a clear area between two heating wires. This sensor reads the floor temperature accurately. Your system then only uses energy when the room needs it.
Hire a certified electrician for the final mains connection. This work falls under building regulations. A qualified professional must sign it off before you cover the floor.
Finishing your floor
Once the system is installed, it’s important to consider your final floor covering and running costs.
| Floor covering | Max. temperature | Key requirement |
|---|---|---|
| Tiles | No strict limit | Excellent conductor, ideal for kitchens and bathrooms |
| Laminate and wood | 27°C | Compatible underlay required |
| Carpet | No strict limit | Combined TOG-rating* below 2.5 |
*Thermal Overall Grade-rating is a unit of measurement for thermal resistance or insulation.
Eco-friendly benefits and combi boilers
Underfloor heating is a genuinely eco-friendly way to heat your home. Wet systems run at low temperatures, typically 35 to 45°C. Radiators need 70 to 80°C for the same job.
Pairing a central heating pump with a modern combi boiler cuts energy waste. This lowers your household carbon emissions and reduces your monthly bills.
Enjoy your perfectly warm home
Installing your own heating system is truly rewarding. By following these steps, you can get rid of cold floors for good and improve your comfort and energy efficiency.
Still choosing the right circulation pump for your setup? Check out our range of circulation pumps, all designed for different room sizes and boiler types. Choose the one that fits your project.
Frequently asked questions heating systems
Many homeowners have questions before starting a big heating project. Here are clear answers to the most common ones.